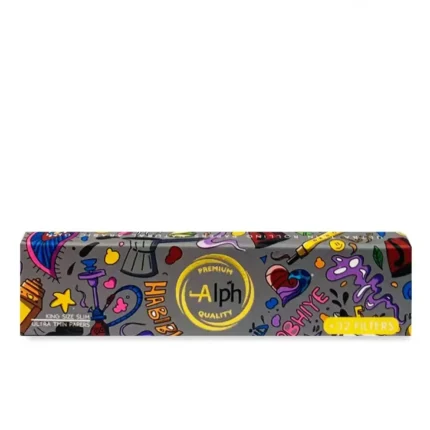
NARCOS white paper tip
NARCOS rolling papers deliver exceptional performance. Crafted with premium France paper, they offer an ultra-thin texture that ensures:
- A slow, even burn to savor every puff.
- Natural Arabic gum for an effortless, secure seal every time.
NARCOS ks slim white paper tips deliver exceptional performance. The slim format makes it easy to roll clean, elegant joints, while the pre-cut tips provide extra convenience. Rolling paper tips, also called filter tips, play a key role in improving your smoking experience. First, they act as a sturdy base for your joint, making it easier to roll and hold. They prevent the end from collapsing or becoming soggy. Second, tips filter debris, stopping small pieces of herbs from being inhaled while still allowing airflow. They also keep your lips cooler by creating a barrier between you and the burning paper. Additionally, tips help reduce waste, as you can smoke your joint to the very end without burning your fingers. Overall, they ensure cleaner, smoother hits.
Guide on Rolling a Joint with Rolling Papers
Step 1: Spread out your rolling paper. Always remember the words, “A tough start mainly achieves better future results” whenever you lay down the rolling paper. Flatten and lay it down for a smooth finish on the tips of the joints. Transition from a laid-back view because the uncovered edge of the sticky strip should face towards you for this to happen. This small action is vital when the production of your cone begins, so take precautions when performing it.
Preparing the Rolling Paper
Step 1: Lay the rolling paper on a flat, solid surface. Right when you open a rolling paper, it’s going to be so squared up that it won’t even bend in any way. To help you with that, a regular trick that you can do is just try to fold it two or three times right in the middle and then pull down from the middle right away. This is going to allow the paper to bend a lot easier, and I assure you it’s going to help you out with your final product.
Step 2: Level the rolling paper. You definitely want your roll to be proportionate, so you don’t want any planes sticking out. To do this, you can simply fold the side of the paper that is longer in the shape of a “U” and slide your thumb in between. Just roll it twice through the edge of your thumb, and you can see that you’re already leveling it up.
Step 3: Position the paper in your rolling hand. After leveling up the paper, you’re simply going to keep doing the same thing: hold it close to your index, middle, ring, and pinky fingers so you don’t lose control over it.
Adding the Herb
Once the marijuana is properly shredded, it is time to put it in the rolling paper. For beginners, this part is a bit more difficult, as some marijuana can be lost during the process and fall by the wayside. To avoid this happening, hold the rolling paper at a 45-degree angle at the reading, and then with the shredded marijuana close the lower tip.
After you position the marijuana close to the reading, close the paper with the tips of your fingers moving up the thread. You should start by doing this by rolling the paper from the top down, basically closing the paper as you go along. You should start by closing the paper tip that was near the mouthpiece and then close the other end with all the plant inside. After rolling some part of the paper, you should push the content slightly with your thumbs and keep rolling the smoking paper until you reach the glue part. With the glue part exposed, it is time to moisten it a bit with your tongue – some prefer using a small moistened instrument to avoid consuming glue and paper impurities. When you have moistened, apply the rest of the paper content with care, making sure that the edge is touching the edges with the previous part of the paper, forming a cylinder. Then you need to apply pressure with your fingers on the glued paper extension, making sure it is well closed.
Rolling the Joint
Hold the paper between your thumbs and forefingers. The gummed side should be facing up, with the gum edge on top. The non-gummed edge should be facing inwards, not outwards. The open side should be perpendicular to the width of the paper. The bone should be held between your middle fingers and your thumbs. Put the mix on the paper in a line. It should start about 0.25 inches from the gum of the paper. The width of the line should be the same along the length of the paper if you can manage it. The right amount of mix will vary according to the wafer. For rolling papers with a length size less than 32 mm, you might need no more than 0.5 grams of smoke to get it started. With a King Size, if you use about 0.7 grams of smoke, this is a typical joint. Around 150-200 mg of smoke will be required for a small joint size.
Distribute the mix with your finger over the length of the paper while it’s in the line. It should be placed in the center and should be evenly distributed over the paper. First, a small pressure should be applied to compact the assortment. Then divide the lower 0.4 inches of the line to either side with your thumbs and forefingers. This will hold the mix in place while you shape the wafer. Carefully lift the paper sides and start shaping the mix with your thumbs. A little force is required to tuck the mix into a small round shape. As you move it further towards the center of the mix, the thumbs should rise with the joint, bending the edge of the paper so you have a fold that’s approximately perpendicular to the length and the width of the paper. This fold will serve as a pinched surface that you can roll the mix into. Only a few wiggles of the thumbs should be required to get the farther end to tuck below the mix and the paper to start rolling around itself. Grasp the edge with your fingers, and use your thumbs and forefingers to softly press off the rolling paper and the mix. Only roll the dough with the fingertips of your hands.


Reviews
There are no reviews yet.